I've spent the last week or so working on the panniers for my 18th Century Court Gown project. The current HSF challenge was pink, which I'll admit, I wasn't too thrilled about. I'm not really a fan of the color. However, I've been trying to make a point of making foundation garments and underpinnings in colors other than white. Not for any aesthetic purpose, mind you, but for practical reasons. I store most of my costumes hanging up in zippered wardrobes, which makes it difficult to tell one white cotton blob apart from any other. Ergo, color. So I thought, what the hell. This is already a ridiculous project. Let's make it just that little bit sillier and make the panniers pink.
I picked up a few yards of white cotton sheeting from Dharma Trading Co and dyed it up in the washing machine. I thought I'd chosen a nice, subdued shade of pink.

I was wrong. That cotton sucked up the dye like it was dying of thirst, and what I ended up with was a violently Pepto-Bismol shade of pink. Well, whatever. It's underwear. Life goes on.
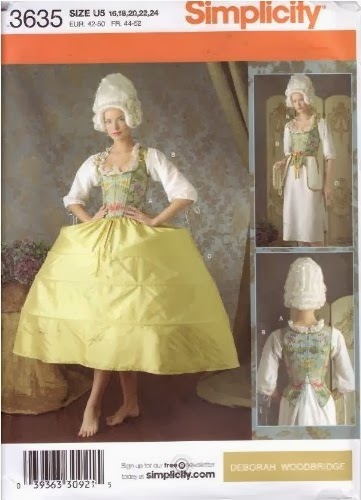 |
| I used Simplicity 3635 as a base for making the panniers. |
I had picked up the pattern second hand, though. And while all of the pattern pieces were present, the instructions were not. However, with only three pieces and a general idea of what the thing was supposed to look like in the end, I was confident I could figure it out. One of the first things that I needed to change, though, was the width. I took an image of the dress I was recreating and superimposed my measurements onto it. As I am both tall and big, the dress was going to have to be stupid wide. Like, 78 inches wide at the hem. *pause for a fit of giggles over just how ridiculous my hobby can be* Ahem. As you can see, I wasn't taking the maths too seriously. The diagram was done up in MS Paint and all measurements were approximate.

Measuring out the pattern pieces, they would give me about 54" width at the hem (of the panniers, which would still be 6-8" above the floor). Assuming that the petticoat and then the skirt of the dress would each add about 2" to the width, I needed the panniers to give me a total of 70". Below is the rough sketch I did up to show where I wanted to add the width. I had originally planned to cut additional center front and back pieces to get the extra width, but it turned out that my fabric was wide enough for me to just add 8 inches to the CF/CB and cut the front and back pieces on the fold.

This is what I came up with:

I seriously spent like five minutes just sitting there laughing at the monstrocity, texting pictures to my costumer friends. While there were certainly a few gowns with this kind of shape (such as the one below) that had that gentle sloping sides, it wasn't what I was looking for.
 |
| Mantua 1755-60, the Victoria and Albert Museum |
So, where did I go wrong? I think the problem here was that, although I widened the front and back of the panniers, I was still gathering the topmost portions into a waistband. This resulted in the bottom being wider than the top. I went back and took a triangle-shaped piece out of the center front and back that was 8" wide at the base, tapering into a dart about three inches below the waist band. This lessened the circumference of the bottom hoop by 16", while affecting the upper hoops less.
 |
MUCH better. |
The gathers at the top of the petticoat should also give a bit more of a boost over the top edges, so I think this rendition will do just fine. I set the dress form up on the dining table so that I could adjust the ties without having to lay on the floor. The other big change I made from the pattern was to shift all of the ties over 3" closer to the center. In the photo of the first draft, you can see how the hoops keep sagging By shifting the ties, the tension gets distributed a bit more evenly. The ties are attached with safety pins for the time being, as I'm still playing with their placement. I'm having trouble getting the spaces between the hoops to stop collapsing like an accordion. If changing the tie placement doesn't fix it, I may go back and put a few pieces of boning in to force them to stay apart.
 |
| Ties connecting front and back of the pannier give it an oval shape. |
 |
| But not quite oval enough. Gotta tighten those ties a bit more! |
The thing is entirely machine sewn. I opted to use bone casing instead of making channels or loops from the cotton. It saved a lot of time (but cost a lot more). My hope was that the casing would help soften the lines of the hoops a bit, so that I can get away with just the one petticoat between them and the skirt of the dress. I left the spaces at the side for accessing pockets extra wide and bound the raw edges white cotton bias tape.
I'm also considering ordering some of the hoop connectors from Farthingales, so currently, the hoops just overlap each other inside the channels by about 10". I wanted to make sure that the entire contraption was easy to pack for air travel, so any of the more permanent methods of connecting the cut ends just wasn't going to work.
Info for the Historical Sew Fortnightly:
Pepto-Pink Panniers!
The Challenge: #3 Pink
Fabric: White cotton sheeting, dyed "coral" pink.
Pattern: Simplicity
Year: 1770s
Notions: 3/4" bone casing, 1/2" cotton twill ties, 3/8" poly satin ribbon, white cotton bias tape and stupid amounts of hoop steel.
How historically accurate is it? Hmm... 7/10.
Hours to complete: about 14, including sketching out the pattern and dyeing the fabric.
Total cost: totally guessing, but probably around $80 US. Hoop steel and bone casing is pricey stuff.
No comments:
Post a Comment